I recently picked up some really nice dragon vain agate and sea sediment jasper, I was going to make some crazy necklace or bracelet but they were so nice by themselves that I wanted to just do a simple necklace. I also thought I'd share how to make such a simple necklace that only takes a few minutes to make!
What you need:wire cutters
- round & flat jewelry pliers
- wire cutters
-
beads or pearls
-
length of chain
-
24 or 25g wire
- clasp & jump rings
*The chain I used has open links, if the chain you are going to use does not have open links wrap the loops you made on the chain as you make them.
 |
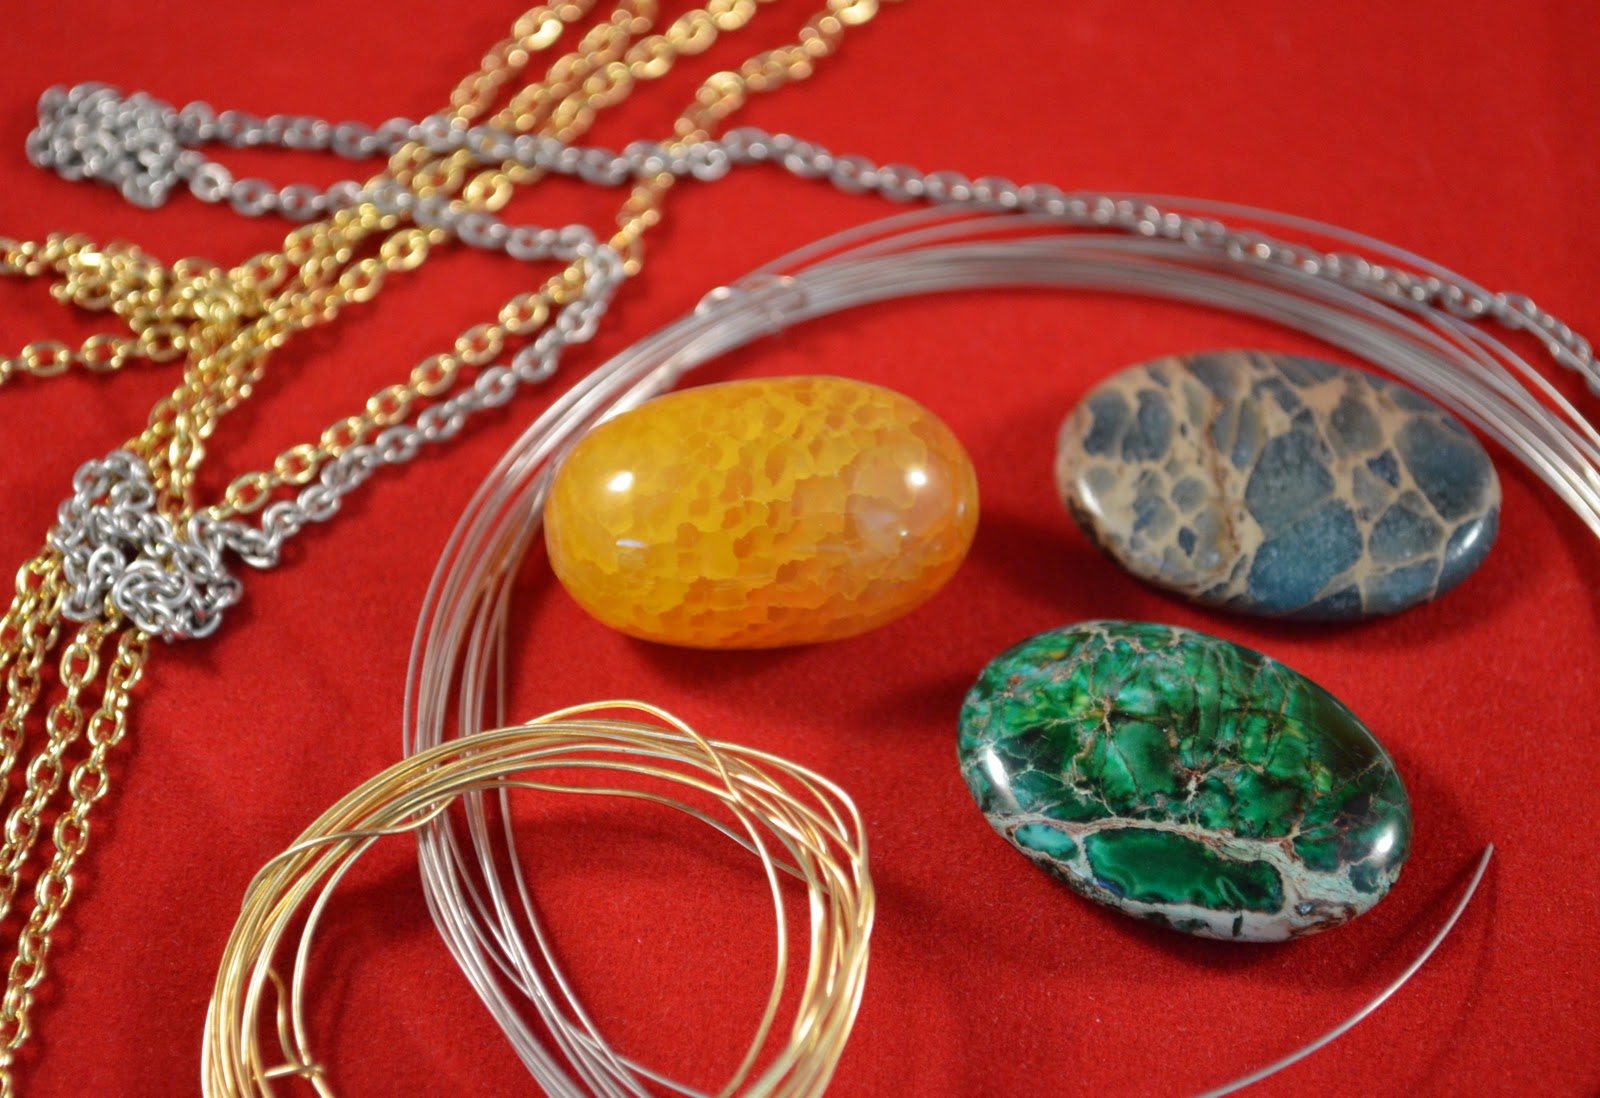
| A few things you will need. |
I went with the gold tone brass but will make the other stones
with the sterling silver from the pictures later.
 |
| Start by threading the wire in the bead. |
You can cut the size of wire before you start but I like to cut
as I go so I don't waste any wire and to make sure I have enough.
 |
| Use the needle nose pliers to make a circle. |
Leave extra on the end so you can wrap the wire around, if
there is a snag on the necklace it will be harder for the wire to
become undone if wrapped around a few times.
 |
| Use you needle nose pliers to round out the loop you made. |
|
|
Also press down all any wire sticking up so it doesn't scratch
you while you wear the necklace. I like to make sure the wire it
tight enough to fit in the drilled hole on the stone.
 |
| One side down. |
|
|
I wrapped the wire 1.5 times.
 |
| Cut the wire. |
I measured 2 finger width, it gave me more then enough
room to work with.
 |
| Wrap around again and press the wrap tightly with flat pliers. |
|
Wrap around the same numbers of times & round off the
loop again.
 |
| Cut off the extra wire. |
Press down the little bit that you couldn't cut off.
 |
| If it is a tight fit the wrapping should hide in the stone. |
It's fine if the wrapping shows, make sure that you did the
same number of wraps just in case it does show.
 |
| Next, start on adding the chain. |
The chain I used links aren't soldered so I can
just open the links to add it to the stone.
 |
| Lightly and slowly open a link. |
Don't twist too hard when you open the links. It will made the
weak and easy to break later if not gently opened.
 |
| Slip one loop on the open link. |
|
|
With the flat pliers close the link shut tightly. Use can
use a little jewelers glue also to keep it closed.
 |
| One side done. |
Do the same to the other side.
 |
| Have your clasp ready. |
I have 2 different styles to the ones I made today
 |
| Measure the chain to the size you want. |
The one pictured is 17.5 inches long.
 |
| Open a link like before. |
Slip a jump ring one end and the clasp on the other.
 |
| Close all links tight and try it on to see if it need any adjustments. |
That's it! You're done! I will probably be making more of
this necklace next week with different stones and metals and listing
them in my
Etsy shop. Stop by if you'd like one!
 |
| Sea sediment jasper gold tone brass necklace. 17" long. |
I love how this one came out!
 |
| Dragon vain agate gold tone brass necklace. 17.5" long. |
I made this one a little longer because the stone is wider.
 |
| Thanks for looking, let me know if you give it a shot! |
Or if you have any questions!
*** Update***
I made some with silver chain!
 |
| I added a small charm! |
The jasper on the silver necklaces are off centered so the
charm hangs in the middle. I also added faceted new jade
to the sides of the jasper.
 |
| It looks great on! |
|
|
 |
| I added faceted pink cherry quartz to the sides of the jasper. |


Wonderful tutorial. Thanks for sharing.
ReplyDeletehttp://shannonhearts.blogspot.com/
Thank you!
DeleteThis is a agreat tutorial for a DIY kind of jewelry. Thank you so much for sharing this one. Wish I could see more of this on your blog.
ReplyDeleteartisan designer jewelry
Thank you very much, I'm so happy to hear you enjoyed it! I am working on more like this & just posted one on earrings the other day. I am going to try to have another jewelry tutorial up later this week too... maybe a nail art one also :)
DeleteThanks for your comment!
did the stones already come with holes in them?
ReplyDeleteThese did not, you can read how I drill here http://akniegirl.blogspot.com/2012/05/simple-diy-drilled-stone-pendants.html
Delete