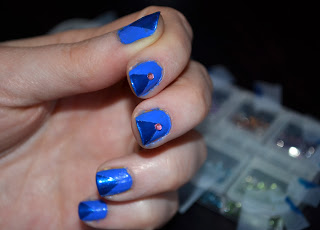
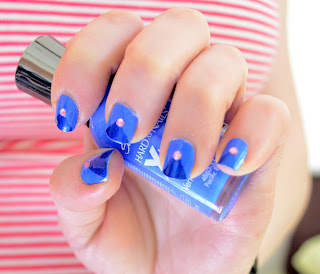
Here's what you'll need: A top coat (I use Sally Hansen Dries Instantly,
dries in about 30 second), feature colors for your triangle, a base
color, crystals, tape, & a head pin/toothpick. Go wild with picking out colors, I went with blue and pink because blue is my boyfriend's favorite color and pink is mine.
First, prep for your manicure, to make it last longer. Remove your old polish, if any, and soak your hands in warm water for a few minutes. Trim your nails and push back your cuticles. Do not use lotions or oils on your hands, it may make the dry time longer.
Before you start made ten 1" pieces of tape and but them in half making 20 pieces. You can do that after you put your base cost on but its nice to have everything ready before you start.
 |
| All I used, I skipped the glitter polish on this one though. |
I was going to add glitter but decided it looked find without.
 |
| Pacific Blue by Sally Hansen. |
Apply the base, I applied 2 coats. You may want to do more depending
on the color and brand of polish you use.
 |
| Let the base dry completely before putting on the tape. |
Once the polish is dry place one strip of tape crossways, make sure to press down firm.
Apply a second strip of tape across the opposite way.
 |
| This is what it will look like after. |
You can also flip the tap and have the triangles at the base of your nails.
 |
| Apply one or two coats over the tips of your nails. |
 |
| Peel off the tape and let it dry. Sally Hanson Blue It. |
 |
| I used my top coat as glue. I put poured some on a piece of tape. |
You can use nail glue or super glue and put it right on the nail. I like using my top coat, looks cleaner at the end. For the crystal you can get them at a beauty supply store or order them online. You might be able to find some kind of flat crystal at a crafts store.
 |
| I used a head pin to pick up and place the crystal. |
Use you pin or toothpick pick up the crystal. Dip the end in the top coat or glue then pick up the crystal while it is still wet, dip the crystal in the top coat or glue then place it on the nail. I placed mine at the point of the triangle but you can place it where ever you'd like. Try to do this step quickly so the crystal doesn't dry on the end of the pin or toothpick.
 |
| While they are still wet you can move them if needed. |
Again, try to be fast so that it doesn't where you don't want it to.
 |
| Side view :) |
Haha, you can see where the tape was!
 |
| Put on your top coat. |
And that is it, all done!
You can clean up around the nail if you got any polish on your skin with nail polish remover or wipe it off in the shower like I do. Warm water is great for getting polish off the skin :)
Sorry most of my pictures were so dark.
Thank you for stopping by & let me know if you give it a try.


I love your nail tutorials. So creative!
ReplyDeletehttp://menacherie.blogspot.com/
Thank ya :)
Delete