Showing posts sorted by relevance for query nails. Sort by date Show all posts

Monday, July 15, 2013

New Polish- Tip Top Nails!

I received some polish from Tip Top Nails South Africa just before my move to Arizona in April. They had messaged me on my fan page on Facebook a few weeks before my move and asked if I would like to try out their polish... I never turn down trying new polish!
A few weeks after the message I had a small box by my door from South Africa :) As soon as I brought the box in I could smell that something was not right though. Sadly, I was right, one of the bottles did not make it.
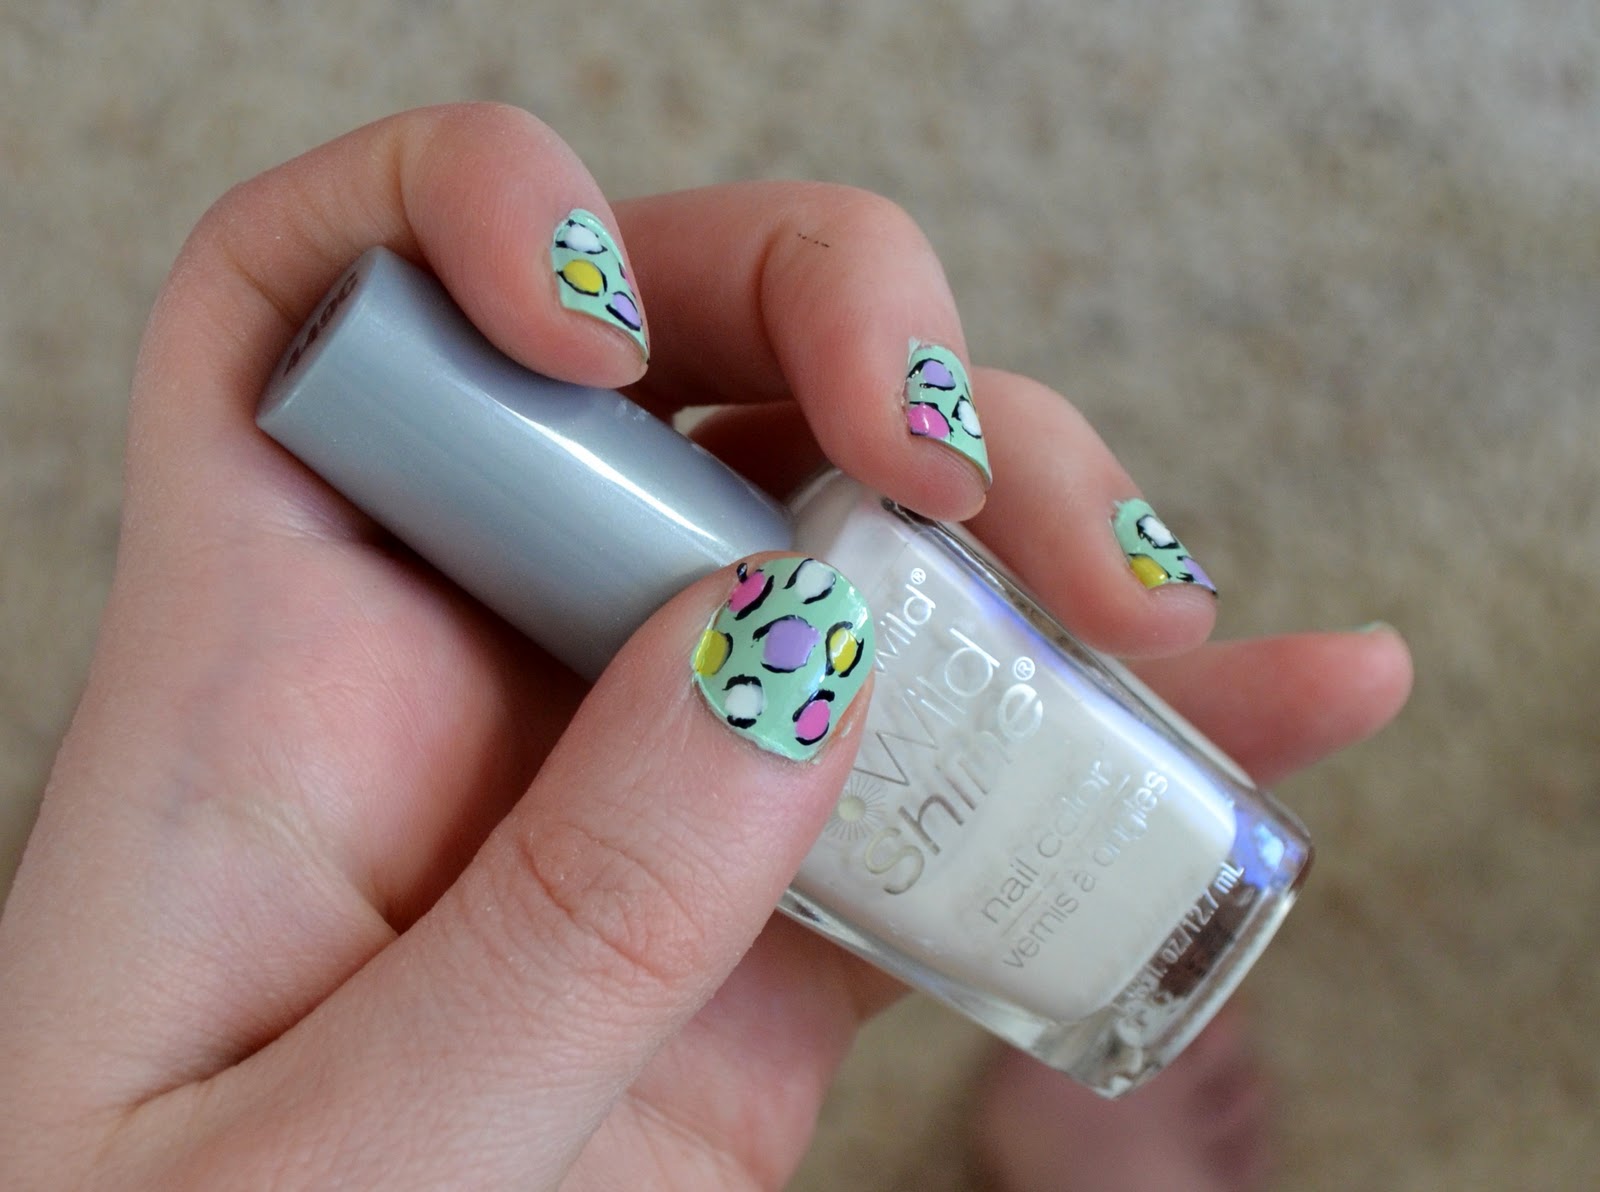
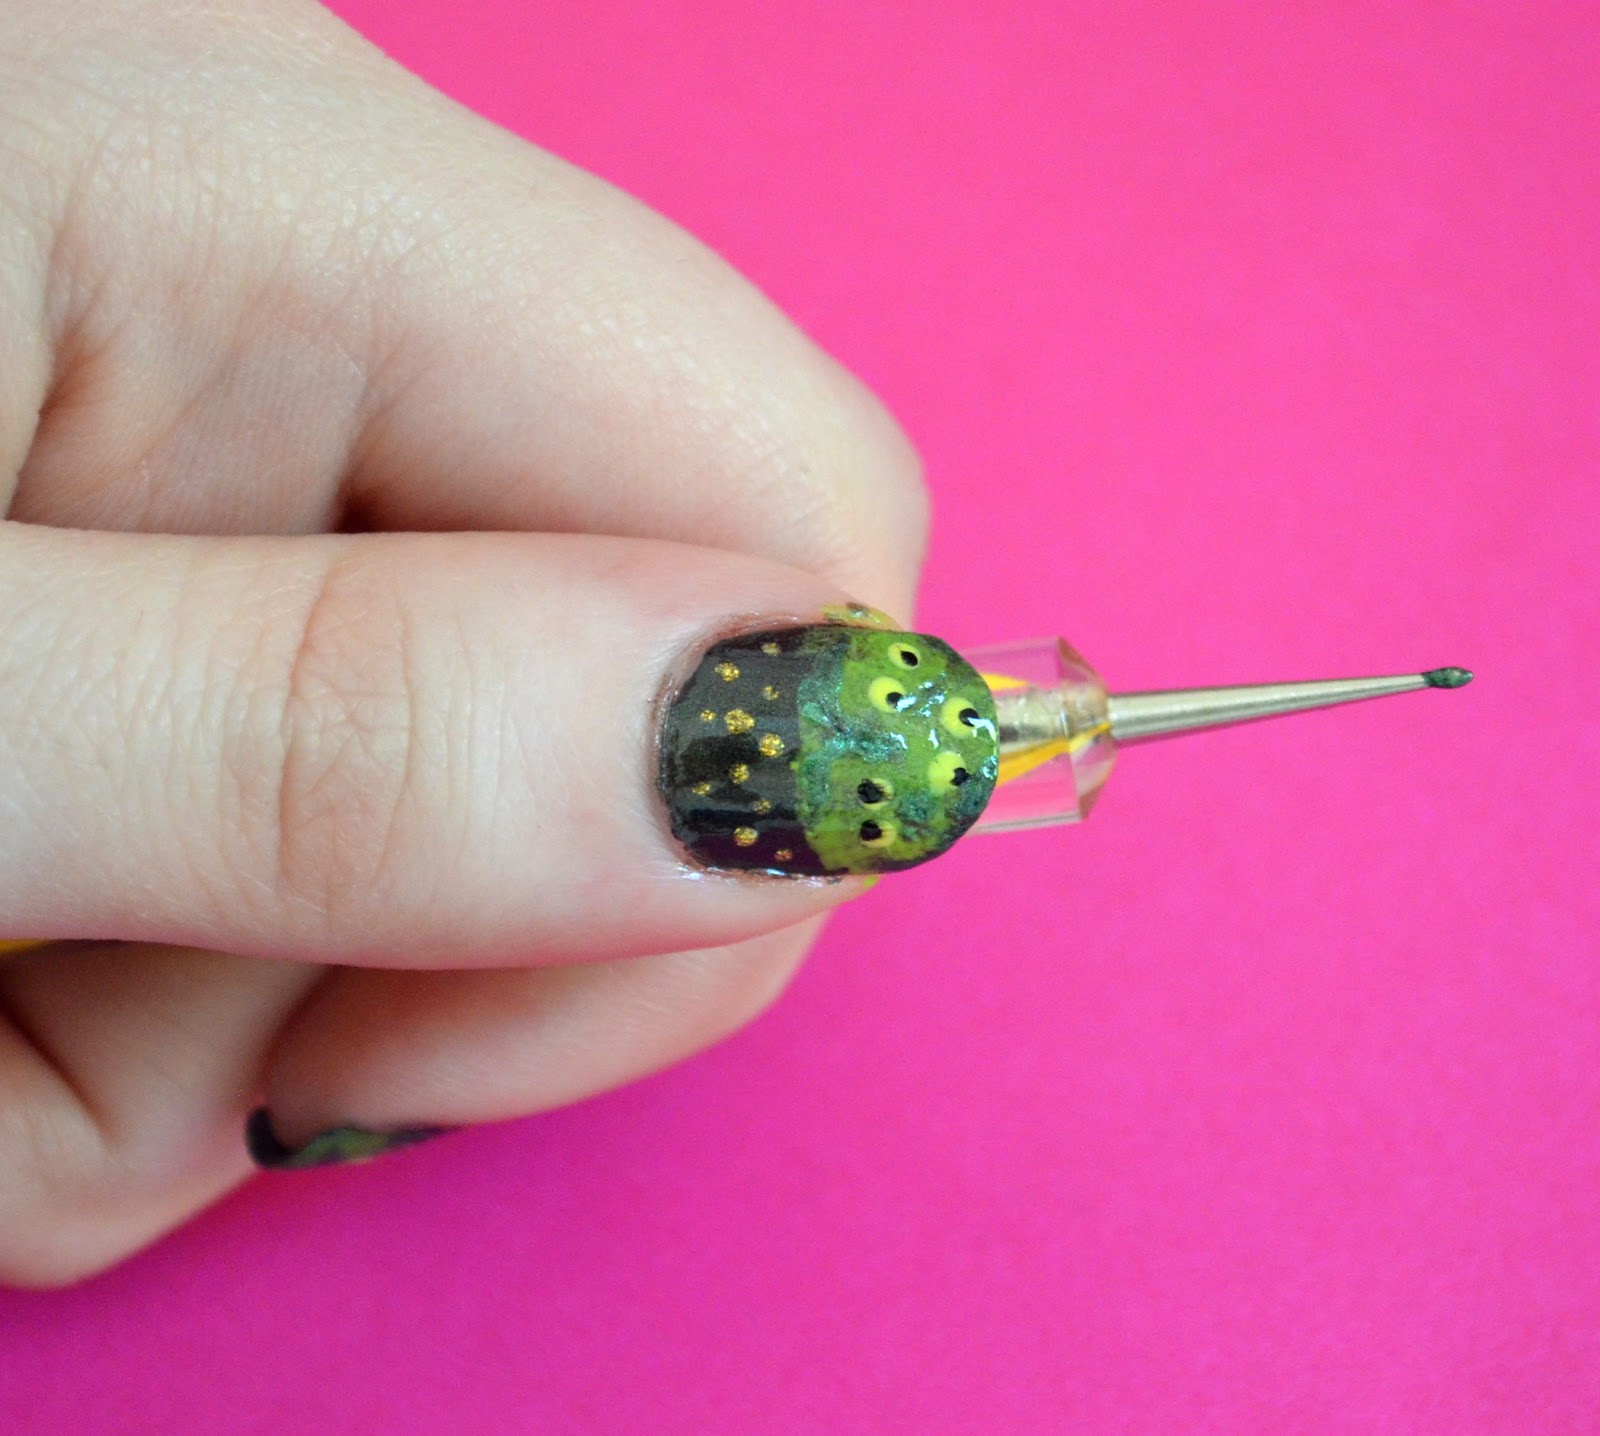
 It looked like such a lovely silver too.  I really didn't have time to play with the other colors other than to do a swatch. I just finished unpacking my office last week and my Tip Top nail polish was in the last box! I cleaned off my nails and did my favorite manicure, dots with dots.
You can find my tutorial for  it here.
The blue is Astronaut, red is Pot-O-Berries and the pink (my favorite from the bunch) is Beauty and the Beach which was a duo with micro beads. They all have a very good coverage and the colors are great. The smell is a bit strong for me because I am pets but I really do love the polish other than that.
It is 4 free as the back of the bottle says and has vitamin e which is lovely.
It seems to be long lasting also, I had it on my nails for 5 days before a chip with a Rimmel top coat... that is a very long time for me since I work with my hands.
Over all, I dig it.

You can find more information on their site here- http://www.tiptopnails.co.za
And! you can shop here for the polish here- http://www.zando.co.za
And again their facebook is here- https://www.facebook.com/TipTopNailsSouthAfrica
Stop by their page and tell em I sent ya ;)

Have you tried Tip Top?
If so, how do you like it?  

Follow this blog with bloglovin'
Follow on Bloglovin

 Disclaimer- The polish was given to me to try. I was not paid nor do I get any kind of commission from them for this post.

Wednesday, December 11, 2013

A update from Lanie Buck

I notice that there is still some movement on this blog and I didn't want to leave anyone hanging and wondering where I went if you don't already know I have started a new blog... and fyi it is going great! 
Head to LanieBuck.blogspot.com to see all that you have missed one on!

Here are a few of the current popular posts-
http://laniebuck.blogspot.com/2013/07/inspired-by-nails-with-tutorial-woven.html
 
DIY Easy Stiletto Nails with No Acrylic! 

http://laniebuck.blogspot.com/2013/08/diy-easy-stiletto-nails-with-no-acrylic.html
 
Wantable November 2013 Makeup Box Review 

http://laniebuck.blogspot.com/2013/11/wantable-november-2013-makeup-box-review.html
 The holiday manis, crafts and recipes are just starting too so be sure to follow my new blog on BlogLovin' and like me on facebook!
Follow on Bloglovin


Friday, June 7, 2013

Easy Patriotic Nails!

The 4th of July is just around the corner so I am starting in on the fun with my nails!
The goodies you will need.
Nail art tape.
Polish- Red (Jackie) White (Bunny) Blue (Ally) Glitter (America)
Star glitter (Used stars from America by Julep)
Top coat (Freedom)
Dotting tool
 Apply Jackie (red) to your index finger, Bunny (white) to middle and pinky fingers, Ally (blue) to thumb and ring fingers.
Apply a light coat of America (glitter polish) to your thumb starting at your base and ending in the middle, apply the same glitter over the white on your middle finger.
Apply a single star to the base of your ring finger, I fished out stars from America.
For the pinky nail
 Stripe your nails with your tape, you may need more or less stripes than me depending on the size of your nail.

Apply Jackie (red) to your nail over the tape and let dry for a minute or two. Take the tape off and you have red and white stripes!
Apply your top coat and you are done!
Enjoy!

Check out my other 4th of July inspired nails!
Like it? pin it!
If you’re not a Maven, sign up here, take the style quiz, and use the code FREEBOX to get your intro box for free (plus $3.99 shipping)!  You have until the 19th or so to be able to order the next coming box. There’s nothing to lose! If you don’t like what’s in the box, you also have until the 24th to skip if you don't want the box, and you won’t be charged a thing!
Also, follow me on bloglovin' to know when there are updates.
Follow on Bloglovin

Thursday, January 5, 2012

How To Paint Your Nails With A Pastel Leopard Print

I have recently gone a little crazy with buying polish and playing dress up with my nails.In the past three weeks I think I have bought about 20 new colors and goodies for my nails. I couldn't decide what color I wanted to I did a leopard so I can use a few :)

All that I used.
I love the pastel colors I found!


Here's what you'll need: A top coat (I use Sally Hansen Dries Instantly, dries in about 30 second), feature colors for your spots, a base color, a dark color for outlining your spots (a nail art pen or a nail art polish helps), and a base coat of your choice (I use Sally Hansen Mint Sorbet). Go wild with picking out colors: for a traditional leopard print, try a beige base, a tawny golden feature color, and a dark brown or black outline. Or else go tone-on-tone, with lime green, medium green, and black — or lavender, purple, and black. Or light blue, royal blue, and black. Whatever.

First, prep for your manicure, to make it last longer. Remove your old polish, if any, and soak your hands in warm water for a few minutes. Trim your nails and push back your cuticles.

Base coat, I applied 2 coats.  Sally Hansen Mint Sorbet.

Nail Art Polish for the outline of the spots. SinfulColors Black. 
 I found "SinfulColors Nail Art" polish at Rite Aid and it was only .99. It's nice for the price and thin brush but it is too thick for doing very detail things, the leopard prints are fine because they don't have to be prefect.
Yay, fine tip!
Make unfinished circles or "c" shaped marks on you nail, what ever design you like best for you print.
Cover the nail with the marks till you're happy with the amount of spots.

Start filling in the spots in blob of polish with the colors you picked out.
Sally Hansen Mellow Yellow.
Try to keep the blobs roughly the same size but do whatever you think looks best.
Sally Hansen Bubblegum Pink.
Try to stay in the lines with the colors, you want to make sure you can still see the black.
Sally Hansen Lacey Lilac
Fill in the spots that are left, try not to put the same color of spots next to each other.
Wet n Wild French White Creme.


 I don't really like this white as a base coat but it worked really well for just spots.
Add a glitter coat if you'd like, this glitter is great if you don't want too much glitter to
show but still want sparkles. SinfulColors Pearl Harbor.
 I found this glitter at Rite Aid also, it was $1.99. I love this Glitter!
Finish with a top coat. Wait about 30 minutes before add a coat so it
doesn't make any of the colors run.
You can't see the glitter but it's all done! You can clean up the extra polish on the skin
with remover and a Q-Tip or just rub it off in the shower like I do.
My left hand is useless! I made a big mess when I did my right hand.

And as you can see it is not as neat as when I use my right hand. Oh well! 

Pretty :)

Wednesday, October 31, 2012

Fake lashes on your nails!

Since I was about 17 everywhere around Halloween I hit any and all store that have fake lashes and buy all the fun cheap lashes. About two years ago while still buying I stopped going to shows and events as much so I have stopped using the lashes I buy. I have maybe 60 pairs under my sink in a small box just not being used so I though I'd give a try adding them to my nails.
This is how they came out, I think they look pretty cool but took a little longer then I thought they would.
Here's what you'll need: A top coat (I use Rimmel Top Coat), a base color , small nail scissors & lashes.
First, prep for your manicure, to make it last longer. Remove your old polish, if any, and soak your hands in warm water for a few minutes. Trim your nails and push back your cuticles but don't cut them. Do not use lotions or oils on your hands before you start, it may make the dry time longer.
Paint you base color, I am using Julep's Sophie. Its currently my favorite color.
Your cheap lashes, I ended up only using one.
Cut it in to ten pieces.
It can be tricky but apply a light coat of your top coat. I wouldn't recommend using your base color, the color may get on the lashes and hide them. 
While nail is still wet use you scissors to cut off the extra, try to cut as close to you nail bed as possible. Apply a few coats of your top coat and your done!
 After doing my left hand it was so much easier.  I was using just a small pair of craft scissor from my desk but after my left hand was done I grabbed our nail scissors and it was so much better!
Let me know if you give it a try!

Check out my November Giveaway!

Tuesday, October 30, 2012

Halloween Inspired Eyes in the Bushes Nails

I've seen a few eye nail art for Halloween so I wanted to do my own. When I think of eyes on Halloween watching you I think of creepy crawlies in the bushes so this is what I cam up with.

Here's what you'll need: A top coat (I use Rimmel Top Coat), a base color (I went with black and a transparent brown), feature colors for your eyes, bush and stars, a sponge or q-tip, & a toothpick/small paint brush/nail art polish.
First, prep for your manicure, to make it last longer. Remove your old polish, if any, and soak your hands in warm water for a few minutes. Trim your nails and push back your cuticles but don't cut them. Do not use lotions or oils on your hands before you start, it may make the dry time longer.
 Creepy eyes watching you from the bushes!
 Start by painting your nails black, I added a transparent brown polish over the black for mine.
 Using a q-tip or sponge cover about 2/3 of your nail with your bush polish, I didn't have a good green color so I mixed two greens.
 With a dotting tool, nail art brush or a tooth pick add a few eyes.
 With a smaller dotting tool or other add the pupil of the eyes.
 If you's like add some glittery stars to your night sky.
 I mixed some green and the brown I used on the black to add some "texture" to the bushes. it looks better in person than it does in the picture!
 Apply your top coat and you are done!

Happy Halloween!

Check out my November Giveaway!