Showing posts sorted by relevance for query julep. Sort by date Show all posts

Monday, April 22, 2013

The brights by Julep for Spring!

The 2013 April polish from Julep was all about color! 


They also had a cuticle pen and dry shampoo that I love! My cuticles look much better after two weeks of use and the pen still has a good bit in it. The dry shampoo is pretty nice too though I have never used another so I have nothing to compare it to. It adds a good amount of volume for the second day which I really like. I always wash my hair every or every other day so this is great for the next day if I have curls and don't feel like having to do my hair over. I think it is safe to say I will be buying more of each later.

I was in the middle of packing for my recent move when it came so I didn't have much time to play with it but I was able to squeeze in 2 manicures before packing my box away :)
I was dying to use their rock candy jelly polish since it was added to Sephora... but I wanted to get it from Julep. I get member points when I buy from Sephora but I get member points and a discount when I buy from Julep so I just wanted till it was added to a box. 
I wanted to use all of the colors in the box as soon as I opened it, I upgraded so I have all these great colors! I love yellow polish with my skin tone so when I saw Abbie I was instantly in love. I thought a french tip with Abbie and Candy would look nice and I was right.
I added some light purple crystals to add a little pop to them.
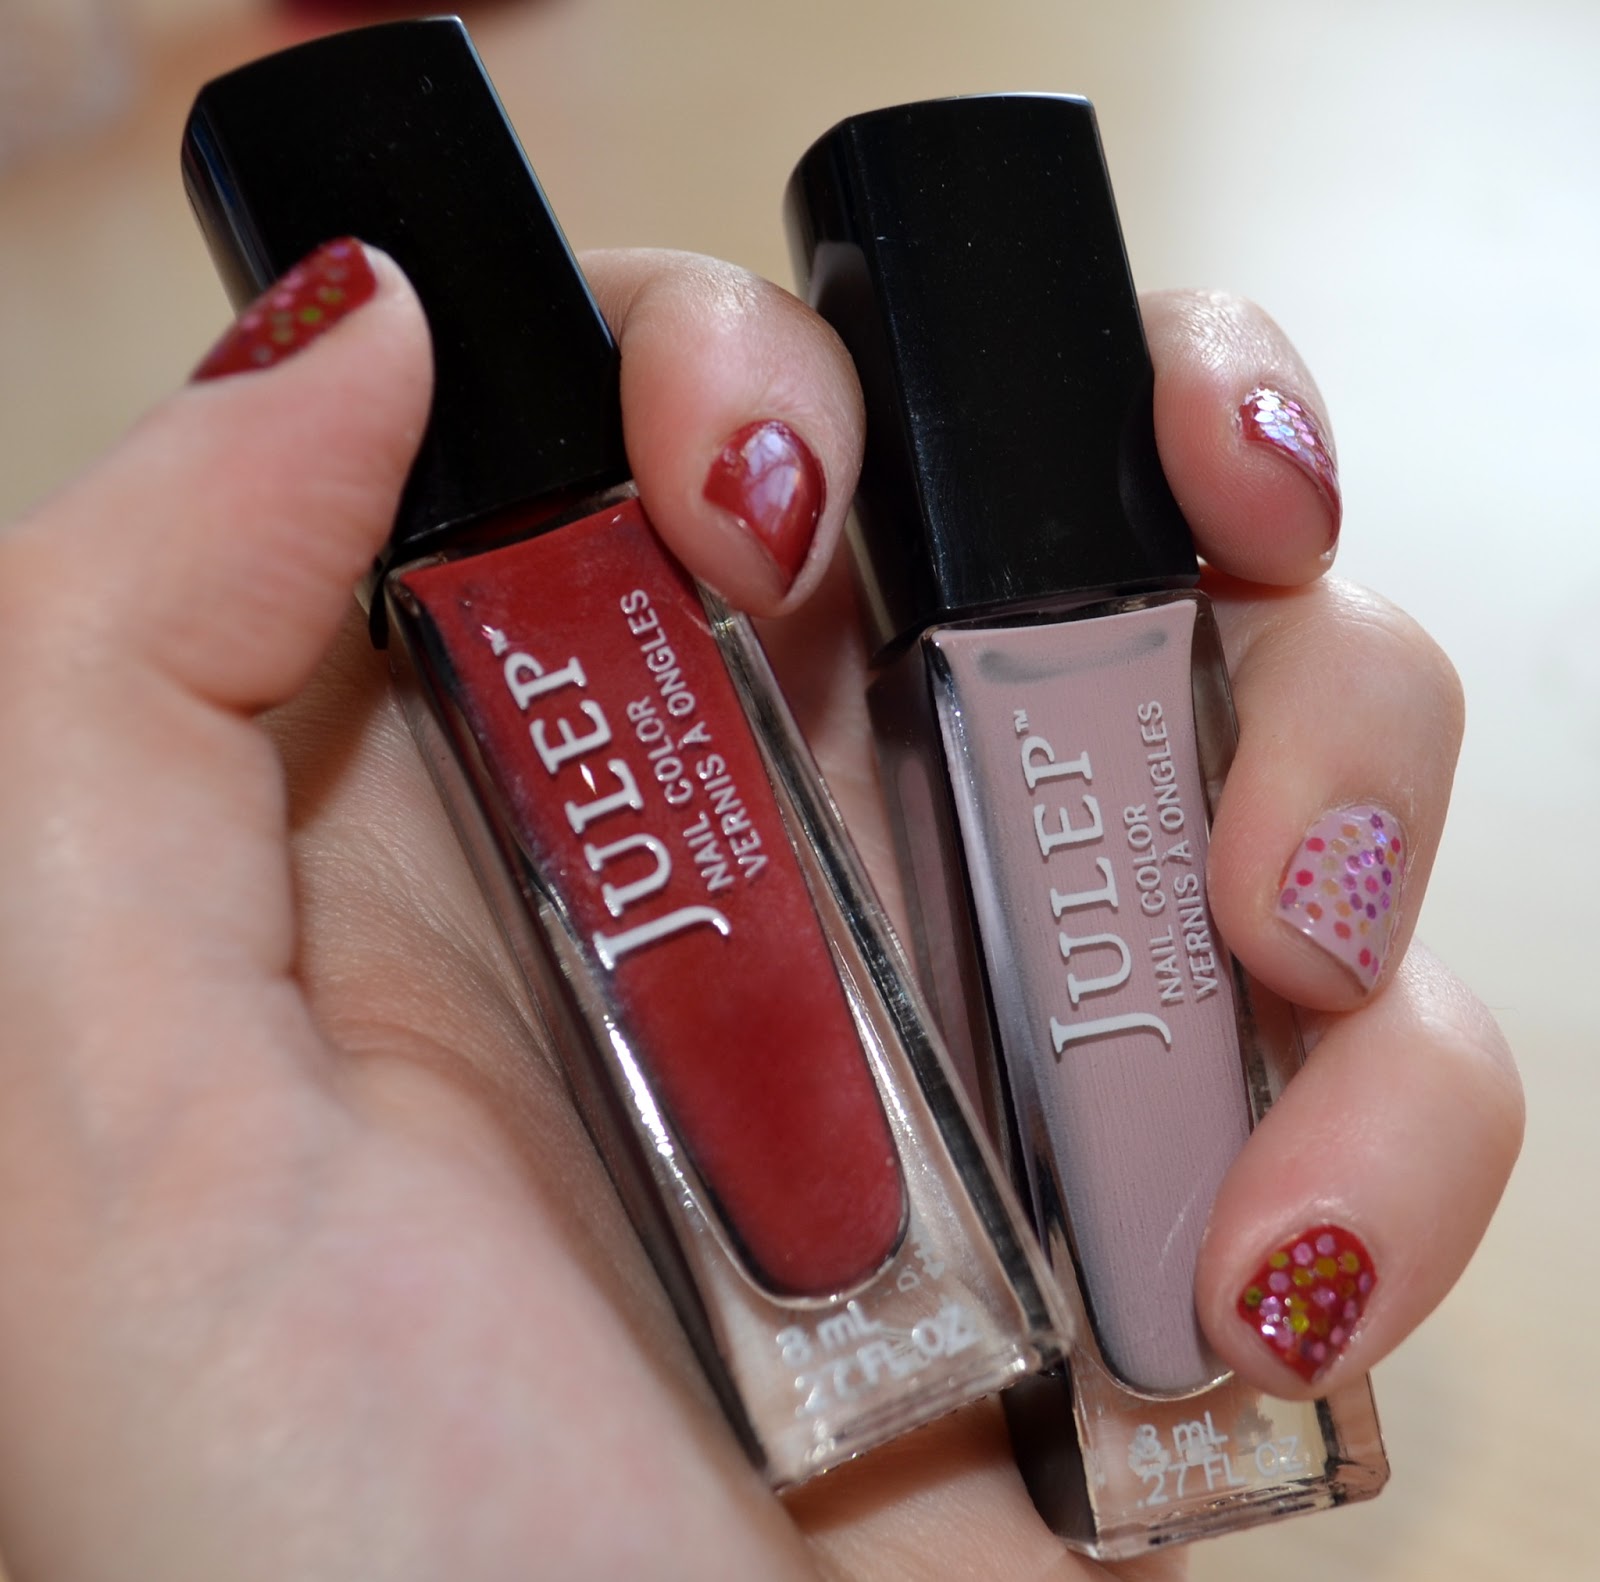
For this look you will need nail art tape, Julep Candy, Abbie, Freedom top coat & crystals.
First, prep for your manicure, to make it last longer. Remove your old polish, if any, and soak your hands in warm water for a few minutes. Trim your nails and push back your cuticles. Do not use lotions or oils on your hands, it may make the dry time longer.

Apply 2-3 coats of Candy or another jelly color. I have 2 coats of Candy.
Make and x with your tape near the tip of you nails so you have the small triangle on the whites of you nails. Apply a coat or two of Abbie or another color if you wish.

After it is completely dry removed the tape. Finish the rest of you nails and add the crystals to the center of you x. You can see how I apply my crystals if needed on this nail tutorial.

Apply a thick coat of your freedom top coat and you are done!

Enjoy your lovely bright nails!

I don't know why my thumb nail corners looks so round... Anyway, here is a close up!

I also got to play with Avery from my Classic with a twist Maven profile. Since is a bright color I used my base coat to help staining of my nails if there was any... when I took off the pink there was no staining thankfully.
I wanted very spring time nails with this pink so I went with light flower to make the pink of Avery pop! 
This is such a lovely pink that my fiance who is known for hating pink loved it, he kept complimenting on how nice the color looked on me.
I think it is safe to say I love the brights from Julep this month and can't wait to play with the rest of colors.
You can find the polish, base and top coat by Julep on their site.
Let me know what style you are!
I'm a classic with a twist :) 
Check out my last spring tutorial with Julep!

Thursday, January 31, 2013

Julep February 2013 Maven Box & Glequins Nails

Julep February 2013 Maven Box & Glequins Nail Tutorial
My Julep box has come and I am so happy with all I got!
 There was even a little surprise in a gold bag. to go with the Red Carpet A-List theme.
  Oxygen Nail Treatment, Freedom Top Coat, Helen & Claudette. 
An added gift that no one knew about is an eyelash curler & two chocolate hearts! 
I like the size of the curler and although I only played with it I think it will replace my big old school one.
 I love the box for the Oxygen Treatment with O2 all over the side.
And the inside of the Freedom Top Coat has Julep Logo inside!
Last month they introduced there "Swatch Me" stickers and I thought it was a little cheesy, I like nice clean bottles. The polish this month came with the stickers on top so I swatched them and I actually like it. Now I want to get more stickers to do the rest.
 The Classic with a twist colors from this month. I was hoping for Valentine's day colors and thankfully my box came with. I had tried a few other styles other then what Julep suggested for me and was not as happy with the as I am with Classic with a twist so even if I think I will not like it I am only going to get Classic.
As you can see I started to do my nails, scroll down to see how I did it.
 You will need Claudette and Helen, glitter pots with small or med sequins, dotting tool/tooth pick/or just anything to pick up the sequin, a top coat and your Freedom Top Coat and a piece of tape or something you can put a top of top coat on.
First, prep for your manicure, to make it last longer. Remove your old polish, if any, and soak your hands in warm water for a few minutes. Trim your nails and push back your cuticles but don't cut them. Do not use lotions or oils on your hands before you start, it may make the dry time longer.
 I started my nails already so after your nails are clean apply a coat or two of your polish. I have Claudette on all but my ring finger where I put Helen.
 Open your glitter pots, I find it easier to use the glitter from the lid. It is flat and easier to just pick up one.
If you are trying to add a little to you lid try not to spill the whole pot on your desk like I did.
 Drop a small amount of polish on a wrapper or tape. I usually use a piece of tape but just use the wrapper for the eyelash curler that came in my box.
 Lightly coat the nail you are working on with a top coat, try to use one that does not dry fast.
 Pick up a very small amount of the top coat with your dotting tool, you will be using it to pick you the sequins.
 Lightly tap the top of a sequin to pick it up, with the top coat at the end it should be easy to pick up.
 Ready to go!
 Put the first in the middle.
 Using another color make a circle around the center.
 And with a third color circle around the last color.
 Finally, finish off with a last circle with the center color you started with.
Depending on your nail size you make need to do another circle.
 In the light you can see a kind of spiral effect due to the circles and different colors used.
Apply your Freedom Top Coat and you are done!
 This is my first time using Julep's Freedom Top Coat and I am in love with it, it is so nice. I tested it on polish with no sequins and it is like using gel! I didn't think it was going to be this good, I am differently going to now only use this top coat. I also love how fast it dried, I can not do last minute nails just before leaving my house like I always do with out having it smudge!
I love the February box, this is the only box so far that I already have plans to buy more of. I am hoping the top coat will be in this months secret store!

I have add-ons for this box that were just shipped, their new Holo polish. I can't wait to try those!

Let me know what style you are!
Other looks with the February colors and the rest of the colors here.
Other looks with Sequins here.
You can find the glitter pots I used here.

Thanks for visiting, hope you enjoyed.

Also, follow me on bloglovin'!
Follow on Bloglovin

Tuesday, May 14, 2013

20's trends with Julep!


My vintage inspired look with Claudette and Kathleen on my nails, Jet Black mascara for the lashes, and Lady in Red on my lips!
I also used  Pro Lesson Palette: Green Eyes & Yaby Concealer.

Send my look some love on my Ipsy profile!

My May Julep goodies!
This month with Julep I went with their new Modern Beauty Maven profile.
I received the Sugar Smooch Lip Scrub: This scrumptious blend of brown sugar, molasses, conditioning oils, vitamin E, and shea butter will leave your lips soft, smooth, and ready for color (or kisses) 
New York Jazz Lipstick Trio: Silky little lip colors inspired by the Roaring Twenties. Set Includes: Tea for Two - Nude shimmer lip sheer, Satin Doll - Poppy lip sheer, Lady in Red - Matte crimson lip color
American Beauty Volumizing Mascara: Jet black. Lash growth enhancement ingredients and micro-fiber applicator separates, conditions, and plumps individual lashes for a thick and gorgeous finish.

No new polish this month but the lipstick more than makes up for it! 
I used a my favorite red by Julep Claudette for my 20's inspired nails. A trend in the 20's was to just paint the middle of the nail a bright red. Gold was also a big hit color for 20's so I added Kathleen.
Here is a fast and easy tutorial.
 The colors used.
 Apply a coat or two of Kathleen
 Using scrapbook fancy scissors cut 10 pieces of tape for each hand.  
 Apply a coat or two of Claudette and wait until it is completely dry.
 Remove the tape, apply you top coat and you are done! 

You can find the goodies used by Julep on their site.
If you're a Maven what did you get?

Monday, May 13, 2013

Bright crystal toes!

I have been rocking boring toes lately so I decided to spice them up since I just got a few awesome new bright colors from Julep.

For this pretty easy look you will need:
A few toes.
2 different polish colors... or more. 
A base and top coat- I used a matte top coat. 
If you are using bright colors like me I would use a base coat to help with staining. I have not had staining with the colors I am using for this look.
Apply Abbie by Julep on all but your big toes.
I used 2 coats.
Next apply the lovely Avery on your big toes.
I again used 2 coats.
I used pink and yellow crystals for this look.
You can also use some kind of glitter if needed.
Apply one the crystal or glitter that matched the big toes to the center of the other toes.
On the big toes apply both colors alternating along the base of your toe. I used 3 pink and 3 yellow for each big toe, you may need more or less depending on the size of your crystals and or toes.
Apply your matte top and you are done!
You can apply a glossy top but since I no longer live by a beach after moving to AZ from CA I wanted that "walking in the sand" look you get from well, walking in the sand :)
Enjoy your toes!

You can find the polish, base and top coat by Julep on their site.
Let me know what style you are!
I'm a classic with a twist :) 
Check out my last spring tutorial with Julep!